There are multiple reasons why someone would prefer an operating system. Microsoft’s Windows has been around for a very long time and is very popular among millions of users.
The ease of use, simplicity of the device along with Microsoft’s long list of apps make it quite an attractive proposition.
Apple devices and its macOS are also a preferred choice for many because of its ecosystem. At the end of the day, it is more like a subjective choice for users.
However, one thing is for certain, everyone at some point or the other is going to experiment with an Apple device.
If you are one of those people, you need to understand that Apple and its macOS differs from Windows in many ways.
In this article, we are going to help users who are looking to write data on their new macOS systems. In addition, we are going to understand how the basics of data and file transfers work when you are shifting from Windows to a macboook.
Writing Files on a macOS: What you need to know
Apple uses its proprietary file system called Hierarchical File System Plus (HFS+) or Apple File System (APFS). This is unlike Windows, which uses New Technology File Systems or NTFS.
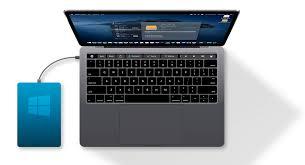
The major difference is that when you want to use a hard drive, which is formatted to NTFS, you will only be able to perform limited functions on it on your Mac device.
In other words, when you attach the NTFS format hard drive to your MacBook or iMac, it will only allow you to read the files. Apple only provides the read-only option for NTFS files.
The question, which then arises is, what if you want to edit the files, copy them or rename them on your Mac? The short answer to this question is that Apple will not allow you to do that!
At this stage you might be asking the question, is there a way around the same? According to experts, there are multiple ways you will be able to read and write NTFS drives free.
What are some strategies which will help you write on NTFS files on your Mac?
- Changing the Format of the External Hard Drive
Almost all external memory hard drives come pre-formatted with NTFS. This means that if you want to continue using your old drive, you need to reformat it to work on your macOS. You have the option of either formatting it to an exFAT format in case you want to continue using the same hard drive with your Windows and your new Mac. Or, if you are not going to use it on Windows anymore, you can go for HFS+ or APFS.
- Using an NTFS for Mac Software
One of the easiest and most common strategies being adopted by users is simply working with an NTFS for Mac software. We all know how an external hard drive needs to be used on both operating systems at some point or the other. Using a credible NTFS driver for mac can help you enjoy the benefits of the hard drive on different systems at the same time.
I would recommend iBoysoft NTFS for Mac, which is easy, affordable, and does not need you to possess a lot of technical knowledge to work. More importantly, the software recently updated to version 3.0. Now it is ready for Apple silicon M1-based Mac computers and macOS Big Sur. If you are using MacBook Air, MacBook Pro, Mac mini with Apple Silicon M1 chips, iBoysoft NTFS for Mac would be the only choice to write NTFS drives on your Mac.

- Dual Formatting your Hard Drive
If you wish to create separate partitions and realign file systems to work on each, you can do that as well. All you need to do is plug in the hard drive to your Mac and then create a partition with the APFS or HFS+ file system software. Once you are done, you need to plug in the hard drive to your Windows and create the NTFS partition. This will allow you to enjoy storage space for working on both Windows and macOS.
The Bottom Line
Of the three options mentioned above, most users who do not want to engage with any kind of complication go for the second option. They prefer downloading and installing a simple NTFS for Mac software on their Apple devices and get to enjoy the complete suite of read-write functions on their MacBook or iMac.
This not only allows you to stay away from the technical complications, but also ensure that your files are safe, and can be fluidly used between the different operating systems. What do you think will be the best option in this regard? Drop your answers in the comments section below.