Have you always loved laptop stickers, but are a little apprehensive about whether they are a good option for you? Or are you ready to stickerbomb your laptop but want to make sure you do it the right way?
Look no further, we have everything you need. In this article, you will find everything you need to know about laptop stickers to make sure you will master every step of the process of finding your perfect stickers.

1. Start out clean
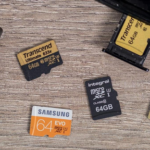
This step is crucial. Being in your bag or backpack, in the office, at university, or in your room, your laptop is likely to collect dust. For your Die Cut stickers to stick perfectly, you need a surface as flat and even as possible. Little particles of dust, dirt or grease are big enough to impact the adhesion of your stickers.
To give yourself the best possible chances of applying your personalised stickers UK perfectly, we recommend cleaning your laptop with an alcohol-based cleaner. A few drops on a cotton bud or pad are already enough. Rub it all over your laptop and let it dry before getting started.
2. Get the right material
We recommend getting custom stickers for your laptop. This means that you are not stuck with generic slogans or images, but can create your own designs and choose your favorite material. If this is your first time looking into custom stickers, the choice on hand can be a little overwhelming, so let us simplify this as much as possible.
Most stickers are made out of paper or plastic. Paper stickers are the perfect option for short term uses, and they are recyclable, which is brilliant. They are, however, not as resistant as vinyl stickers. Vinyl stickers are durable and resist water, scratches and oils.
Laptops are likely to experience bumps and scratches or will get in contact with a leaking water bottle or a lunch boxes in your bag or backpack. Vinyl stickers are ideal to withstand these stresses. However, if your laptop is protected at all times by a case, paper stickers can work just as well.
Vinyl comes in many different colours and effects, ranging from glitter and holographic to fluorescent and transparent. You can choose your favorite material to create amazing effects. To illustrate that, let us have a look at the composition of a laptop sticker.

- First, a gloss laminate functions as a protective layer, making your sticker resistant to sunlight, scratching and water.
- Then, we have your custom printed layer, showing the design you choose.
- This is your chosen material which gives your sticker are great effect.
- Here we have a permanent, medium-strength adhesive – ideal for sticking to your laptop.
- Finally, its thick backing paper makes your sticker easy to peel.
3. Pick your favorites
Before you apply your stickers, you want to find an aesthetic you like. Pinterest, Instagram and Google are the perfect places to start when you are on the hunt for inspiration. Just type in “sticker aesthetic” or “laptop stickers inspiration” and get started.
The biggest trend is to sticker bomb your laptops. This means you will be covering your laptop’s entire surface with stickers until it cannot be seen anymore. To give this a try, you first need to find enough stickers to cover your laptop. We recommend creating a custom sticker sheet, this way, you get loads of different designs.
When applying your stickers, ensure you keep your favorite stickers until last. If you put them on first, they are very likely to get covered under a heap of stickers. If you cannot decide between your favorite designs and love them all, transparent stickers might be the perfect option for you. You can layer these but still see through them.

4. Apply from the center
Laptop stickers have a pressure-sensitive adhesive. Their adhesive is activated as soon as pressure is put on your sticker. Do not put pressure on, if you are not sure about your sticker’s positioning. If you are unsure and would like to test some spots, place it there lightly so you can reposition if necessary.
When you are happy with your spot, apply pressure from the sticker’s center and slowly make your way outwards. This way, you can remove any air bubbles that might appear. We recommend using your thumb or credit card for this.
And that is it, now you know all there is about laptop stickers and how to get the most out of them. We hope you found these tips helpful and would love to see your creations. Please feel free to share them with us or ask questions in the comments below.