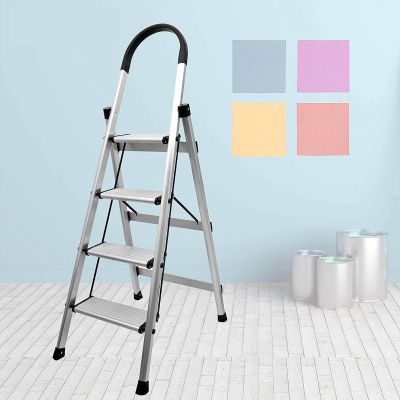
Most people are unaware that step ladders have a lot more uses than simply helping you reach heights. This handy tool of carpenters is a daily driver but it can also be dangerous so be careful! Make sure before you start any work as a carpenter that you have the right insurance policy. This handy little guide will teach you six of the most useful step ladder tips and tricks you may have been missing!
- TOOL HOLDER
The first trick is to use the little holes on the top of the ladder. These are really tool holders, which are easy to miss. They’re great for holding screwdrivers and hammers in place, but they can also hold pliers and other tools.
They’re also big enough to grip a single handle of a larger instrument, such as adjustable pliers or a nail puller. Organize your tools so they’re precisely where you need them.
The oval-shaped hole in my 8-foot Louisville is for holding a hammer. Simply insert the handle into the aperture, and it will hang under the top.
My 6-foot Werner has a round hole in the middle that serves the same purpose. And, because it’s a little bigger, it has a second purpose: It can also hold a drill! It’s just big enough for the chuck and drill bit to pass through, and it keeps the handle within reaching distance while you work.
- HANDLE CLIP
I had no clue what this tab was for years until I saw someone use it. It’s where you’ll keep your paintbrush!
The bucket will hang down in front of you if you connect the wire handle of a one-gallon paint can beneath the lip of this small tab. Then all you have to do is reach over the ladder with your brush and paint directly from the bucket.
- BUCKET CIRCLES
These concentric rings are also used to store paint buckets, although they’re a little higher up on the ladder in case you’re working further up.
For quart cans, use the slightly smaller circle. The circles that are even smaller can be used for a variety of things, such as sample-size cans.
You may find that some of the older models do not have a lot of bucket circles. For instance, there’s just one circle on my Louisville, and it’s for quart-sized cans. But most step ladders include at least one circle, which might be useful.
- HARDWARE POCKET
This rectangular indentation serves as a hardware storage pocket where you can store a variety of hardware, including nuts, bolts, and screws. This small pocket is convenient, but it has one major flaw: If you have to move the ladder, your hardware can easily slip out.
I prefer to utilise neodymium magnets to fix this problem. Simply apply a few dabs of super glue on the back of a rare earth magnet. Then, reach beneath the ladder and press the magnet into the fastener pocket’s underside. The glue should set within thirty seconds. The hardware will now stay exactly where it should when you are using the ladder. You can simply drop your screws and nails into the pocket and know you won’t lose them, saving you a lot of time.
Again, not all ladders will incorporate a hardware pocket. For instance, the 8-foot Louisville does not have any pockets. However, the entire top is gently depressed. So you can just choose a corner, put your magnet there, and your fasteners will be secure.
- UTILITY HOOKS
I make sure that every instrument I regularly use when up on ladders has one of these small hooks on it. In certain circumstances, they’re referred to as “skyhooks” or simply “utility hooks,” and they’re included with most modern equipment (though you can buy them separately as well.)
The hooks allow you to hang your tools anyplace the hook will fit. For example, I prefer to suspend my drill on the Werner ladder’s spreader bar. If necessary, I can easily access it from lower locations on the ladder.
I also only purchase caulking guns that have a large U-shaped hook on the end. That way, I can hang them from the ladder’s back support bar.
- CORD CONTROL
If you can’t use a cordless tool and have no alternative but to place your corded tool on top of the ladder, you’re going to need some form of cord control. Otherwise, when you connect it to a power wire, it’ll constantly disconnect itself—or, worse, the weight of a thick cord will drag it straight off the ladder!
That could be pretty dangerous. You risk being hurt, breaking the instrument, or causing damage to your home or the property you’re working on.
To solve the problem, I like to attach my power cable to the ladder’s top back support. I just wrap my arm over the bar and allow approximately two to three feet of slack. The cord is now right at your fingertips.
As an added bonus, some ladders feature a front semi-circular groove. This groove is designed to house a paint accessory tray. However, it’s also precisely formed to retain a power cord’s end.
You can simply squeeze it in there so it becomes wedged in place before the appliance is plugged into the mains supply.
That’s all there is to it—Six step ladder tips and techniques for you to try out for yourself.
Read how to resolve Microsoft Outlook Error [pii_email_cbd448bbd34c985e423c]


